Instructor Dashboard Handbook
Everything you need to run your teaching through DriveThruL: claiming students, your diary, lesson recaps, and your money. Ten minutes to read, and here whenever you need it. Prefer watching? The video walkthroughs cover the same ground.
Signing in & your home screen
You are here: drivethrul.co.uk → Login
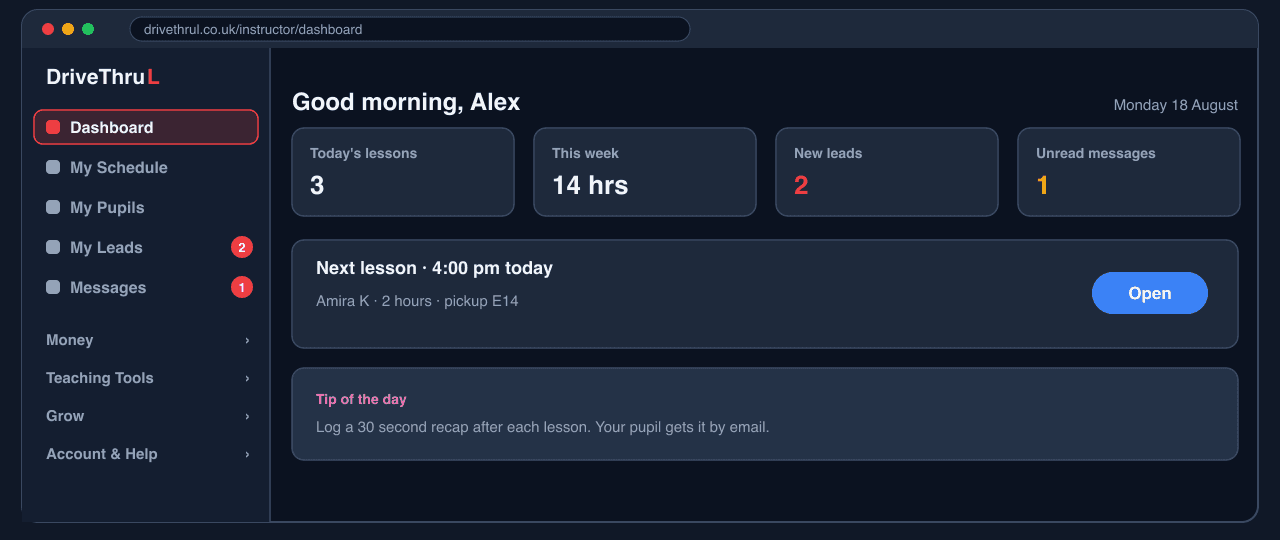
Your dashboard works in any browser, on your phone or computer. Once you sign in, the home screen shows your day at a glance so you always know what needs your attention first.
- 1Go to drivethrul.co.uk and tap Login.
- 2Sign in with your email address and password. You can also ask for a sign-in link by text from the login page.
- 3You land on your home screen: today's lessons, new leads waiting, unread messages, and your next lesson.
Finding your way around
You are here: The menu, on every screen
The menu on the left (or the tabs along the bottom on your phone) is the same everywhere. The top five items are your daily tools. Everything else sits in four plainly named groups, so nothing is more than two taps away.
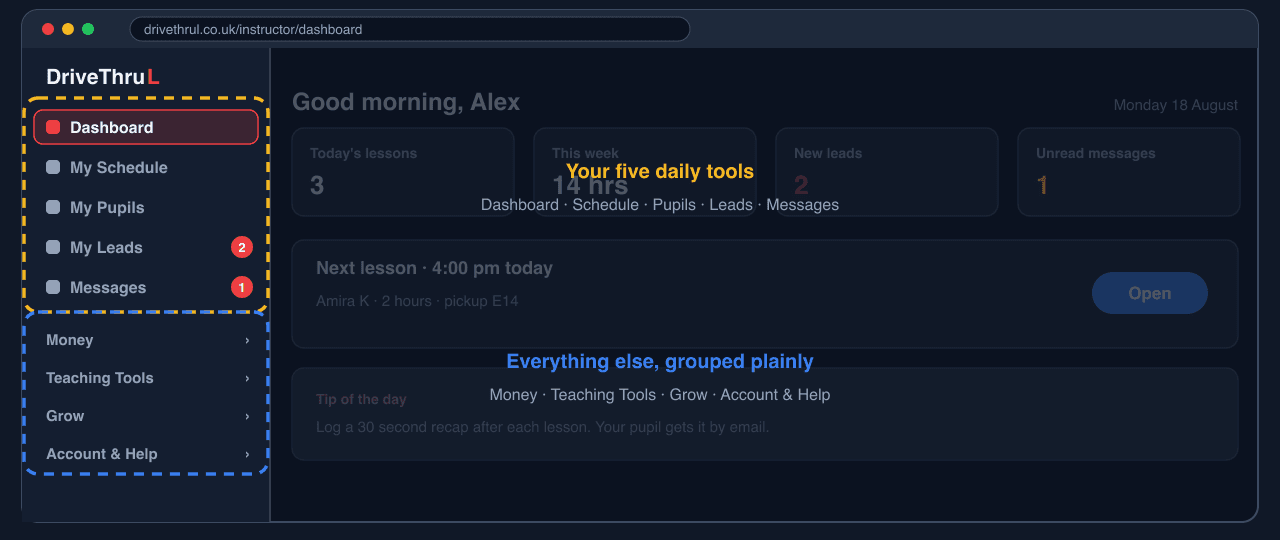
- 1Dashboard, My Schedule, My Pupils, My Leads, Messages: the five you will use every day.
- 2Money holds the Finances Hub and the How Fees Work page.
- 3Teaching Tools has the Students Hub, mock tests and teaching aids; Grow has your packages, reviews and CPD.
- 4Account & Help is your profile, settings, and Help & Tour.
My Leads: claiming a student
You are here: Menu → My Leads
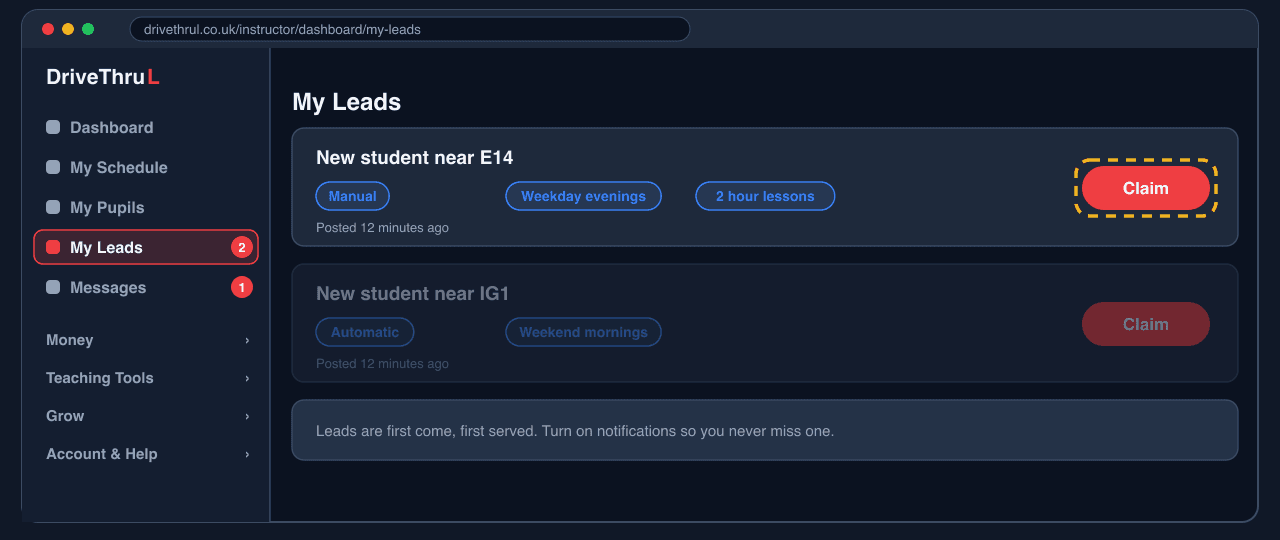
When the school has a new student in your area, the lead appears in My Leads with the postcode, transmission, and preferred lesson times. Leads are first come, first served across all instructors covering that area.
- 1Watch for the red badge on My Leads, or the notification on your phone.
- 2Open the lead and check the area, transmission and times suit you.
- 3Tap Claim. The student is now yours, and no other instructor can take them. Claiming records the lead fee against the card; the next section explains exactly how that works.
- 4Once the student's details are released to you, get in touch and arrange the first lesson.
Lead fees & the session counter
You are here: Menu → My Leads, on a claimed lead
There is one fee, and it is simple: £30 per new student the school sends you (£25 if you are a roof-sign Ambassador). No subscription, nothing up front, and every penny the student pays you for lessons is yours. This section walks through how that one fee behaves in every situation.
Most of the time, the fee settles itself
When you claim a student, the fee is recorded against the lead but nothing is taken from you. If your student then pays their £30 deposit online, and most do, that deposit covers your fee in full. You never see a bill.
Why the session counter protects your money
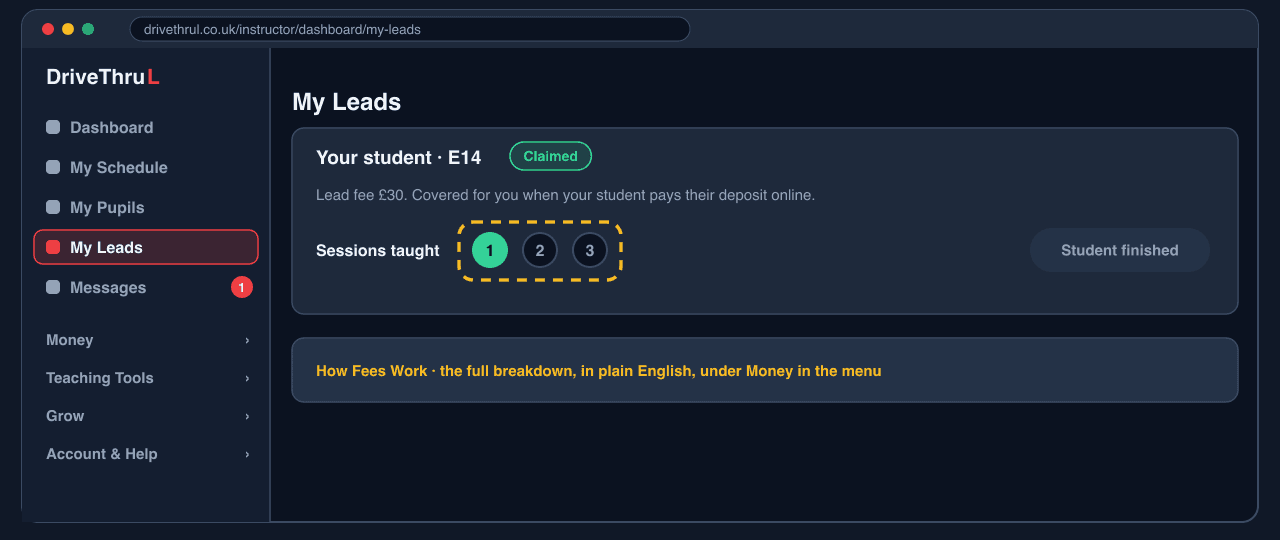
The school does not keep the whole deposit on day one. Its share builds at £10 per sessionacross the student's first three lessons: £10 after the first, £20 after the second, £30 after the third. The session counter on the lead card is how the school knows how far you got, and that has a direct cash consequence for you:
- 1After each of the student's first three lessons, tap the session counter on the lead card. One tap, at the kerb, done.
- 2If the student stops before their third lesson, tap Student finished. The school keeps only its earned share, and the unused remainder of the deposit is credited to your deposit pot. Example: one lesson taught, then the student stops. The school keeps £10 and £20 lands in your pot.
- 3If the card is never updated, after 28 days the system assumes the student carried on and the school keeps the full £30. An honest counter is money in your pocket, so do not skip it.
If the deposit never arrives
Sometimes a student starts lessons without paying the online deposit. The fee is then yours to settle, on a forgiving timetable: nothing at all is due for the first two weeks, it then falls due in stages, and the full amount is only reached at 28 days. You can settle it three ways: by card from the lead card itself, by bank transfer (no card charges), or from your deposit pot if you have credit sitting there.
If a student lets you down
A student who never responds, no-shows, or vanishes before lessons start is not your cost. Report it from the lead card and the fee will not stand; you only ever pay for students you actually get. Reporting promptly also helps the school chase the student or send you a replacement lead sooner.
The fee at a glance
| What happens | What you pay |
|---|---|
| Student pays their £30 deposit online | Nothing. The deposit covers your fee. (Trainees pay only the part above £30.) |
| Deposit paid, student stops after one or two lessons | Nothing, and the unused deposit (£20 or £10) is credited to your pot. |
| No deposit, but you teach the student | £30, settled by card, bank transfer, or your deposit pot within 28 days. |
| Student no-shows or never responds | Nothing. Report it from the lead card. |
My Schedule
You are here: Menu → My Schedule
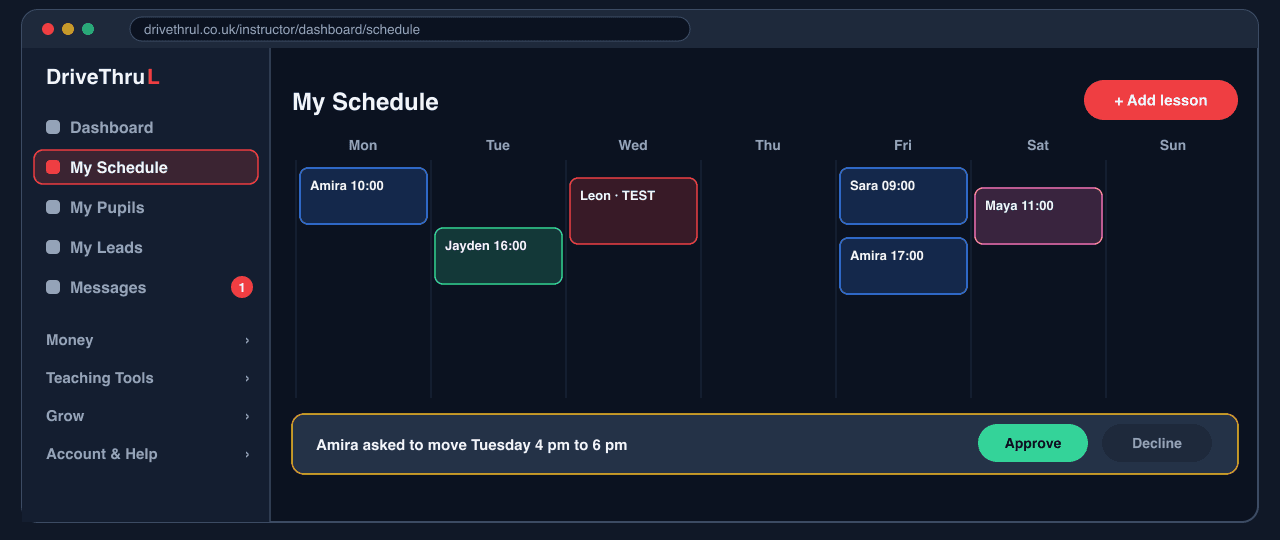
My Schedule is your diary. Lessons you add yourself and bookings made through the school all appear in the same calendar, so there is one place to look before you say yes to anything.
- 1Tap + Add lesson to put a lesson in the diary. Your pupil sees it on their side too.
- 2When a pupil requests a new lesson, or asks to move one, it appears here. Approve or Decline with one tap.
- 3Set your weekly availability. Those hours are how the school matches new students to you, so keep them honest.
Open your diary so pupils book themselves
Below your weekly hours is Open your diary for booking. With it on, a pupil already matched to you (deposit paid) picks one of your open slots from their own dashboard and the lesson lands straight in your diary. Nothing is charged at booking. You get a notification and an email, and so do they. Times you have booked, blocked or put in the diary are never offered, and you choose how much notice you need and how far ahead they may book. Turn it off any time and pupils go back to suggesting times for you to approve.
- 1Save at least one weekly slot first. An open diary with no hours shows a pupil nothing.
- 2Switch on Open your diary for booking. If it says your ADI number is still being verified, message us and we will confirm it the same day.
- 3Set minimum notice (how close to a lesson a pupil may book) and how far ahead. The defaults, 12 hours and 60 days, suit most instructors.
Days off and holidays
Use Days Off & Extra Dates on the schedule page. Pick the first day, and for a holiday the last day too, choose Block (Day Off / Holiday)and tap Add Entry. Blocked days disappear from every pupil's booking tool at once and your weekly hours stay as they were for when you are back. The same box adds extra hours on a day you do not normally work. A diary entry (an appointment, a test day) blocks its time too, so you only need to record each thing once.
My Pupils & lesson recaps
You are here: Menu → My Pupils
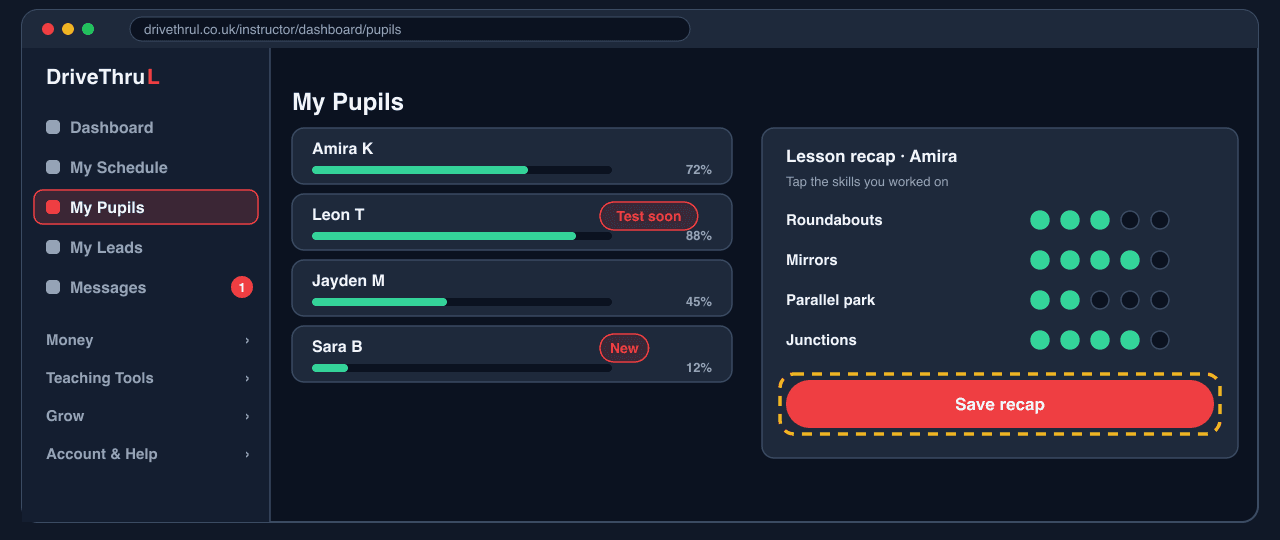
My Pupils lists everyone you teach, with each pupil's progress towards test standard. The habit that makes this page powerful is the thirty-second recap after every lesson.
- 1After a lesson, open the pupil and start a recap.
- 2Tap the skills you worked on and the level the pupil reached. It takes about thirty seconds at the kerb.
- 3Tap Save recap. Your pupil automatically gets a progress email, and their readiness score builds towards test day.
Recording payments & lesson hours
You are here: Menu → My Pupils → open a pupil → Money at a glance
Every pupil's page has a Money at a glance card: their deposit, what is still to collect on their package, every payment you have recorded, and a running count of the hours they have paid for versus the hours they have had. Keeping it honest takes seconds.
- 1When a pupil pays you, cash or bank transfer, tap + Record payment. It goes straight into your Finances Hub and tax statement too, so you record it once and never keep two sets of books.
- 2If the card shows an amount left to collect, tap Collected? next to it. The payment comes pre-filled with the right amount, so it is two taps.
- 3Only tick “This payment buys new hours” when they are buying a fresh block. Leave it off when you are collecting money for hours already showing in their total.
- 4Lessons in your diary count towards their hours automatically. Taught a lesson that was never in the diary? Tap Log hours.
Messages
You are here: Menu → Messages
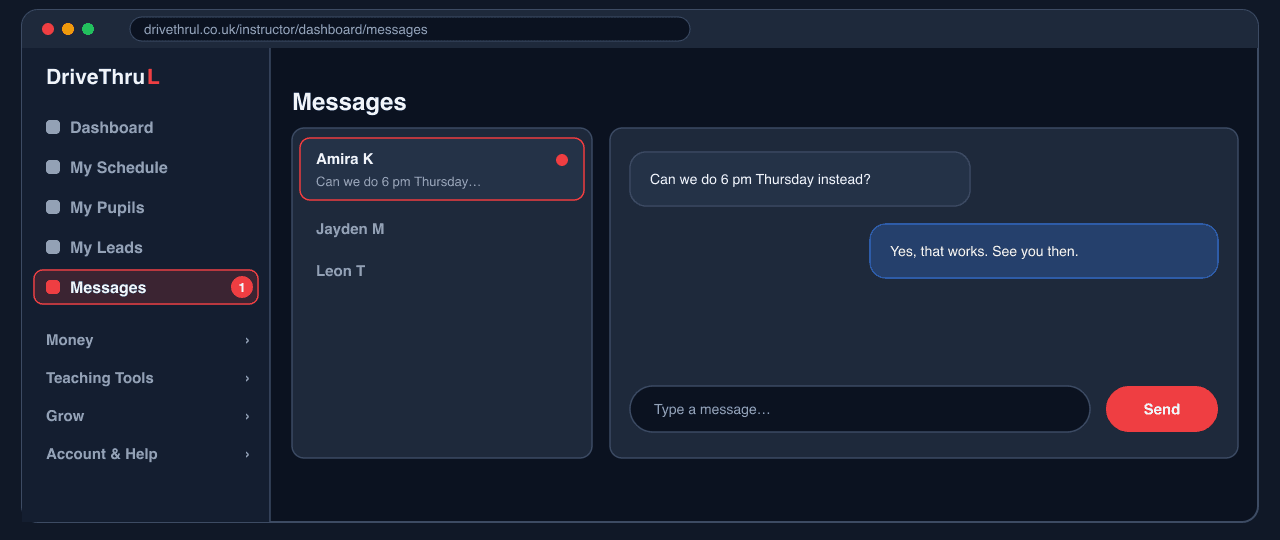
Messages keeps every pupil conversation in one place, so numbers and chat history never get lost in your phone. A red badge on the menu means something is waiting for you.
Finances Hub
You are here: Menu → Money → Finances Hub
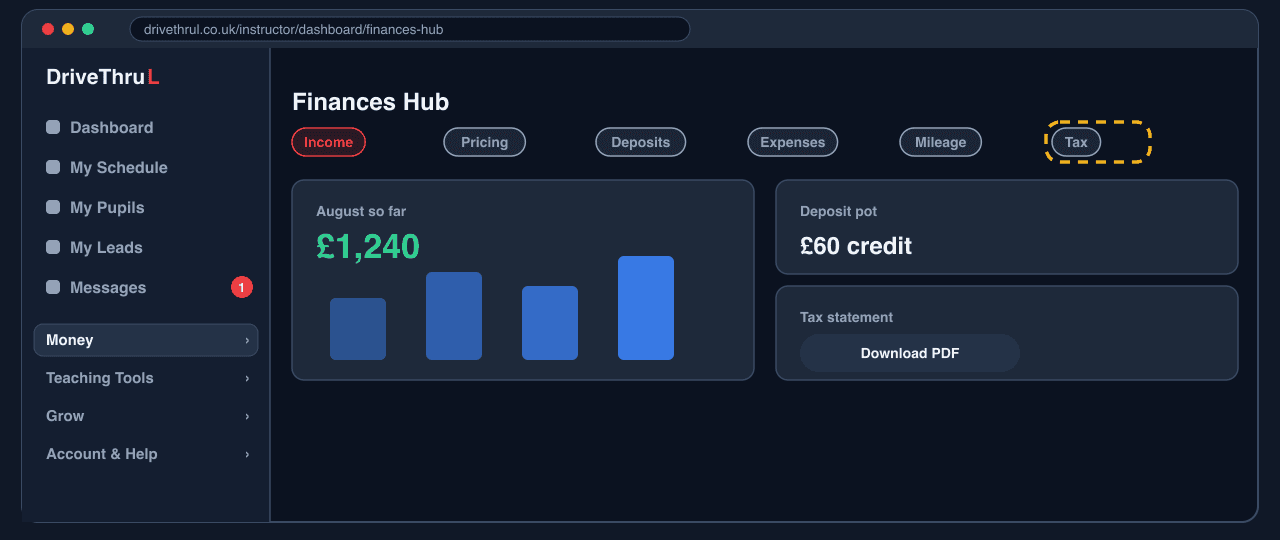
The Finances Hub is your whole teaching business in one place, laid out as tabs across the top of the page.
- 1Income shows what you have earned, month by month.
- 2Pricing is what you charge pupils; Deposits is your credit pot with the school.
- 3Expenses and Mileage capture your costs as you go.
- 4Tax turns all of it into a statement you can download and hand straight to your accountant.
Your profile & getting help
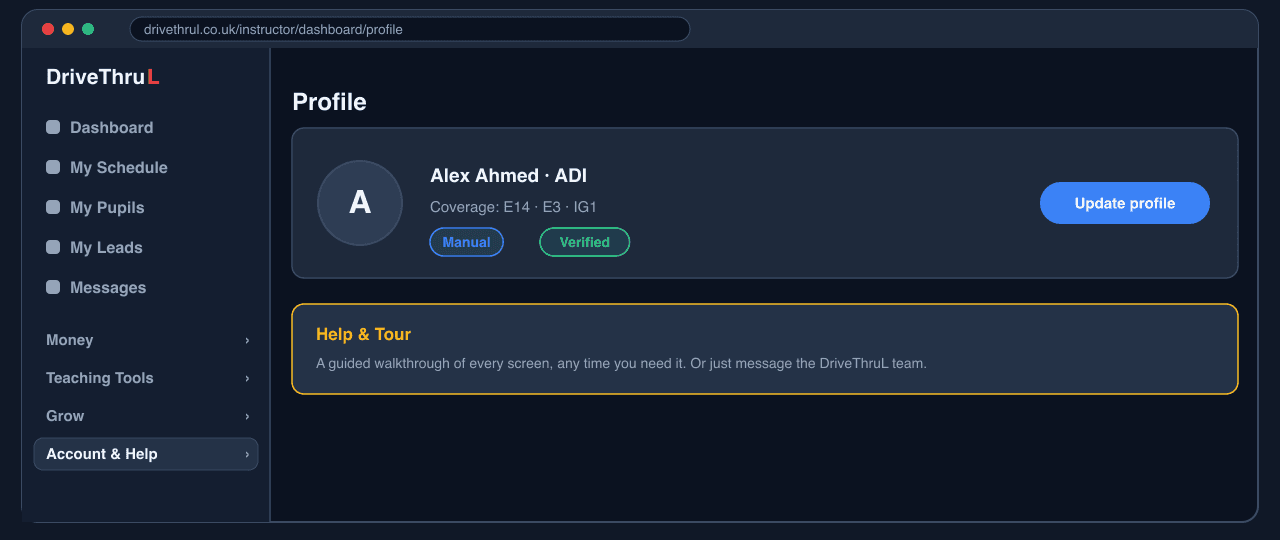
You are here: Menu → Account & Help → Profile
Your profile is what students see. Keeping it fresh takes a minute and directly affects the leads you are offered.
- 1Keep your coverage postcodes up to date. They decide which leads reach you.
- 2Check your car, transmission and photo whenever something changes.
- 3Stuck on anything? Open Help & Tour for a guided walkthrough, or message the DriveThruL team.
Quick reference
| I want to… | Go to |
|---|---|
| Take on a new student | My Leads → Claim |
| Record a taught session on a new student | My Leads → session counter on the card |
| Add or move a lesson | My Schedule |
| Change the hours I work | My Schedule → weekly availability |
| Let pupils book my open slots themselves | My Schedule → Open your diary for booking |
| Block a day off or a holiday | My Schedule → Days Off & Extra Dates → Block |
| Log what a pupil learned | My Pupils → open the pupil → recap |
| Record cash or a bank transfer from a pupil | My Pupils → open the pupil → + Record payment |
| See how many paid hours a pupil has left | My Pupils → open the pupil → Money at a glance |
| Log hours for a lesson that was never in the diary | My Pupils → open the pupil → Log hours |
| Reply to a pupil | Messages |
| See my income or download a tax statement | Money → Finances Hub |
| Understand the £30 fee | Money → How Fees Work |
| Change my coverage area or photo | Account & Help → Profile |
| Get a guided tour | Account & Help → Help & Tour |
Need a hand? info@drivethrul.co.uk · 020 3397 7273
Screens in this handbook are illustrations of the dashboard; names and figures shown are examples, not real pupils.
Back to the instructor guide